useRangeCalendar
Provides the behavior and accessibility implementation for a range calendar component. A range calendar displays one or more date grids and allows users to select a contiguous range of dates.
| install | yarn add @react-aria/calendar |
|---|---|
| version | 3.0.0-alpha.3 |
| usage | import {useRangeCalendar} from '@react-aria/calendar' |
API#
useRangeCalendar<T>(
  props: RangeCalendarProps<T>,
  state: RangeCalendarState,
  ref: RefObject<HTMLElement>
): CalendarAria
useCalendarGrid(
  (props: CalendarGridProps,
  , state: CalendarState
    |  | RangeCalendarState
)): CalendarGridAria
useCalendarCell(
  props: AriaCalendarCellProps,
  state: CalendarState
    |  | RangeCalendarState,
  ref: RefObject<HTMLElement>
): CalendarCellAria
Features#
There is no standalone range calendar element in HTML. Two separate <input type="date"> elements could be used, but this is very limited in functionality, lacking in internationalization capabilities, inconsistent between browsers, and difficult to style. useRangeCalendar helps achieve accessible and international range calendar components that can be styled as needed.
- Flexible – Display one or more months at once, or a custom time range for use cases like a week view.
- International – Support for 13 calendar systems used around the world, including Gregorian, Buddhist, Islamic, Persian, and more. Locale-specific formatting, number systems, and right-to-left support are available as well.
- Accessible – Calendar cells can be navigated and selected using the keyboard, and localized screen reader messages are included to announce when the selection and visible date range change.
- Touch friendly – Date ranges can be selected by dragging over dates in the calendar using a touch screen, and all interactions are accessible using touch-based screen readers.
- Customizable – As with all of React Aria, the DOM structure and styling of all elements can be fully customized.
Anatomy#
A range calendar consists of a grouping element containing one or more date grids (e.g. months), and a previous and next button for navigating through time. Each calendar grid consists of cells containing button elements that can be pressed and navigated to using the arrow keys to select a date range. Once a start date is selected, the user can navigate to another date using the keyboard or by hovering over it, and clicking it or pressing the Enter key commits the selected date range.
useRangeCalendar returns props that you should spread onto the appropriate elements:
| Name | Type | Description |
calendarProps | HTMLAttributes<HTMLElement> | Props for the calendar grouping element. |
nextButtonProps | AriaButtonProps | Props for the next button. |
prevButtonProps | AriaButtonProps | Props for the previous button. |
title | string | A description of the visible date range, for use in the calendar title. |
useCalendarGrid returns props for an individual grid of dates, such as one month, along with a list of formatted weekday names in the current locale for use during rendering:
| Name | Type | Description |
gridProps | HTMLAttributes<HTMLElement> | Props for the date grid element (e.g. <table>). |
weekDays | WeekDay[] | A list of week days formatted for the current locale, typically used in column headers. |
useCalendarCell returns props for an individual cell, along with states and information useful during rendering:
| Name | Type | Description |
cellProps | HTMLAttributes<HTMLElement> | Props for the grid cell element (e.g. <td>). |
buttonProps | HTMLAttributes<HTMLElement> | Props for the button element within the cell. |
isPressed | boolean | Whether the cell is currently being pressed. |
isSelected | boolean | Whether the cell is selected. |
isFocused | boolean | Whether the cell is focused. |
isDisabled | boolean | Whether the cell is disabled. |
isOutsideVisibleRange | boolean | Whether the cell is outside the visible range of the calendar. For example, dates before the first day of a month in the same week. |
formattedDate | string | The day number formatted according to the current locale. |
State is managed by the useRangeCalendarState hook from @react-stately/calendar. The state object should be passed as an option to useRangeCalendar, useCalendarGrid, and useCalendarCell.
Note that much of this anatomy is shared with non-range calendars. The only difference is that useRangeCalendarState is used instead of useCalendarState, and useRangeCalendar is used instead of useCalendar.
Date and time values#
Dates are represented in many different ways by cultures around the world. This includes differences in calendar systems, date formatting, numbering systems, weekday and weekend rules, and much more. When building applications that support users around the world, it is important to handle these aspects correctly for each locale.
useRangeCalendar uses the @internationalized/date library to represent dates and times. This package provides a library of objects and functions to perform date and time related manipulation, queries, and conversions that work across locales and calendars. Date and time objects can be converted to and from native JavaScript Date objects or ISO 8601 strings. See the documentation, or the examples below for more details.
useRangeCalendarState requires a createCalendar function to be provided, which is used to implement date manipulation across multiple calendar systems. The default implementation in @internationalized/date includes all supported calendar systems. While this library is quite small (8 kB minified + Brotli), you can reduce its bundle size further by providing your own implementation that includes only your supported calendars. See below for an example.
Example#
A RangeCalendar consists of three components: the main calendar wrapper element with previous and next buttons for navigating, one or more CalendarGrid components to display each month, and CalendarCell components for each date cell. We'll go through them one by one.
For simplicity, this example only displays a single month at a time. See the styled examples section for more examples with multiple months, as well as other time ranges like weeks.
import {useRangeCalendarState} from '@react-stately/calendar';
import {useRangeCalendar} from '@react-aria/calendar';
import {useLocale} from '@react-aria/i18n';
import {createCalendar} from '@internationalized/date';
// Reuse the Button from your component library. See below for details.
import {Button} from 'your-component-library';
function RangeCalendar(props) {
let { locale } = useLocale();
let state = useRangeCalendarState({
...props,
locale,
createCalendar
});
let ref = React.useRef();
let { calendarProps, prevButtonProps, nextButtonProps, title } =
useRangeCalendar(props, state, ref);
return (
<div {...calendarProps} ref={ref} className="calendar">
<div className="header">
<Button {...prevButtonProps}><</Button>
<h2>{title}</h2>
<Button {...nextButtonProps}>></Button>
</div>
<CalendarGrid state={state} />
</div>
);
}
import {useRangeCalendarState} from '@react-stately/calendar';
import {useRangeCalendar} from '@react-aria/calendar';
import {useLocale} from '@react-aria/i18n';
import {createCalendar} from '@internationalized/date';
// Reuse the Button from your component library. See below for details.
import {Button} from 'your-component-library';
function RangeCalendar(props) {
let { locale } = useLocale();
let state = useRangeCalendarState({
...props,
locale,
createCalendar
});
let ref = React.useRef();
let {
calendarProps,
prevButtonProps,
nextButtonProps,
title
} = useRangeCalendar(props, state, ref);
return (
<div {...calendarProps} ref={ref} className="calendar">
<div className="header">
<Button {...prevButtonProps}>
<
</Button>
<h2>
{title}
</h2>
<Button {...nextButtonProps}>></Button>
</div>
<CalendarGrid state={state} />
</div>
);
}
import {useRangeCalendarState} from '@react-stately/calendar';
import {useRangeCalendar} from '@react-aria/calendar';
import {useLocale} from '@react-aria/i18n';
import {createCalendar} from '@internationalized/date';
// Reuse the Button from your component library. See below for details.
import {Button} from 'your-component-library';
function RangeCalendar(
props
) {
let { locale } =
useLocale();
let state =
useRangeCalendarState(
{
...props,
locale,
createCalendar
}
);
let ref = React
.useRef();
let {
calendarProps,
prevButtonProps,
nextButtonProps,
title
} = useRangeCalendar(
props,
state,
ref
);
return (
<div
{...calendarProps}
ref={ref}
className="calendar"
>
<div className="header">
<Button
{...prevButtonProps}
>
<
</Button>
<h2>{title}</h2>
<Button
{...nextButtonProps}
>
>
</Button>
</div>
<CalendarGrid
state={state}
/>
</div>
);
}
CalendarGrid#
The CalendarGrid component will be responsible for rendering an individual month. It is a separate component so that you can render more than one month at a time if you like. It's rendered as an HTML <table> element, and React Aria takes care of adding the proper ARIA roles and event handlers to make it behave as an ARIA grid. You can use the arrow keys to navigate between cells, and the Enter key to select a date.
Note: this component is the same as the CalendarGrid component shown in the useCalendar docs, and you can reuse it between both Calendar and RangeCalendar.
import {useCalendarGrid} from '@react-aria/calendar';
import {VisuallyHidden} from '@react-aria/visually-hidden';
import {startOfWeek, getWeeksInMonth} from '@internationalized/date';

function CalendarGrid({state, ...props}) {
  let {locale} = useLocale();
  let {gridProps, weekDays} = useCalendarGrid(props, state);

  // Find the start date of the grid, which is the beginning
  // of the week the month starts in. Also get the number of
  // weeks in the month so we can render the proper number of rows.
  let startDate = startOfWeek(state.visibleRange.start, locale);
  let weeksInMonth = getWeeksInMonth(state.visibleRange.start, locale);

  return (
    <table {...gridProps}>
      <thead>
        <tr>
          {weekDays.map((day, index) => {
            return (
              <th key={index}>
                {/* Make sure screen readers read the full day name,
                  but we show an abbreviation visually. */}
                <VisuallyHidden>{day.long}</VisuallyHidden>
                <span aria-hidden="true">
                  {day.narrow}
                </span>
              </th>
            );
          })}
        </tr>
      </thead>
      <tbody>
        {[...new Array(weeksInMonth).keys()].map(weekIndex => (
          <tr key={weekIndex}>
            {[...new Array(7).keys()].map(dayIndex => (
              <CalendarCell
                key={dayIndex}
                state={state}
                date={startDate.add({weeks: weekIndex, days: dayIndex})} />
            ))}
          </tr>
        ))}
      </tbody>
    </table>
  );
}
import {useCalendarGrid} from '@react-aria/calendar';
import {VisuallyHidden} from '@react-aria/visually-hidden';
import {
getWeeksInMonth,
startOfWeek
} from '@internationalized/date';
function CalendarGrid({ state, ...props }) {
let { locale } = useLocale();
let { gridProps, weekDays } = useCalendarGrid(
props,
state
);
// Find the start date of the grid, which is the beginning
// of the week the month starts in. Also get the number of
// weeks in the month so we can render the proper number of rows.
let startDate = startOfWeek(
state.visibleRange.start,
locale
);
let weeksInMonth = getWeeksInMonth(
state.visibleRange.start,
locale
);
return (
<table {...gridProps}>
<thead>
<tr>
{weekDays.map((day, index) => {
return (
<th key={index}>
{
/* Make sure screen readers read the full day name,
but we show an abbreviation visually. */
}
<VisuallyHidden>{day.long}</VisuallyHidden>
<span aria-hidden="true">
{day.narrow}
</span>
</th>
);
})}
</tr>
</thead>
<tbody>
{[...new Array(weeksInMonth).keys()].map(
(weekIndex) => (
<tr key={weekIndex}>
{[...new Array(7).keys()].map((dayIndex) => (
<CalendarCell
key={dayIndex}
state={state}
date={startDate.add({
weeks: weekIndex,
days: dayIndex
})}
/>
))}
</tr>
)
)}
</tbody>
</table>
);
}
import {useCalendarGrid} from '@react-aria/calendar';
import {VisuallyHidden} from '@react-aria/visually-hidden';
import {
  getWeeksInMonth,
  startOfWeek
} from '@internationalized/date';

function CalendarGrid(
  { state, ...props }
) {
  let { locale } =
    useLocale();
  let {
    gridProps,
    weekDays
  } = useCalendarGrid(
    props,
    state
  );

  // Find the start date of the grid, which is the beginning
  // of the week the month starts in. Also get the number of
  // weeks in the month so we can render the proper number of rows.
  let startDate =
    startOfWeek(
      state.visibleRange
        .start,
      locale
    );
  let weeksInMonth =
    getWeeksInMonth(
      state.visibleRange
        .start,
      locale
    );

  return (
    <table
      {...gridProps}
    >
      <thead>
        <tr>
          {weekDays.map(
            (
              day,
              index
            ) => {
              return (
                <th
                  key={index}
                >
                  {
                    /* Make sure screen readers read the full day name,
                  but we show an abbreviation visually. */
                  }
                  <VisuallyHidden>
                    {day
                      .long}
                  </VisuallyHidden>
                  <span aria-hidden="true">
                    {day
                      .narrow}
                  </span>
                </th>
              );
            }
          )}
        </tr>
      </thead>
      <tbody>
        {[...new Array(
          weeksInMonth
        ).keys()].map(
          (weekIndex) => (
            <tr
              key={weekIndex}
            >
              {[...new Array(
                7
              ).keys()]
                .map(
                  (dayIndex) => (
                    <CalendarCell
                      key={dayIndex}
                      state={state}
                      date={startDate
                        .add(
                          {
                            weeks:
                              weekIndex,
                            days:
                              dayIndex
                          }
                        )}
                    />
                  )
                )}
            </tr>
          )
        )}
      </tbody>
    </table>
  );
}
CalendarCell#
Finally, the CalendarCell component renders an individual cell in a calendar. It consists of two elements: a <td> to represent the grid cell, and a <div> to represent a button that can be clicked to select the date. The useCalendarCell hook also returns some information about the cell's state that can be useful for styling, as well as the formatted date string in the current locale.
Note: this component is the same as the CalendarCell component shown in the useCalendar docs, and you can reuse it between both Calendar and RangeCalendar.
import {useCalendarCell} from '@react-aria/calendar';
function CalendarCell({ state, date }) {
let ref = React.useRef();
let {
cellProps,
buttonProps,
isSelected,
isOutsideVisibleRange,
isDisabled,
formattedDate
} = useCalendarCell({ date }, state, ref);
return (
<td {...cellProps}>
<div
{...buttonProps}
ref={ref}
hidden={isOutsideVisibleRange}
className={`cell `}
>
{formattedDate}
</div>
</td>
);
}
import {useCalendarCell} from '@react-aria/calendar';
function CalendarCell(
{ state, date }
) {
let ref = React
.useRef();
let {
cellProps,
buttonProps,
isSelected,
isOutsideVisibleRange,
isDisabled,
formattedDate
} = useCalendarCell(
{ date },
state,
ref
);
return (
<td {...cellProps}>
<div
{...buttonProps}
ref={ref}
hidden={isOutsideVisibleRange}
className={`cell `}
>
{formattedDate}
</div>
</td>
);
}
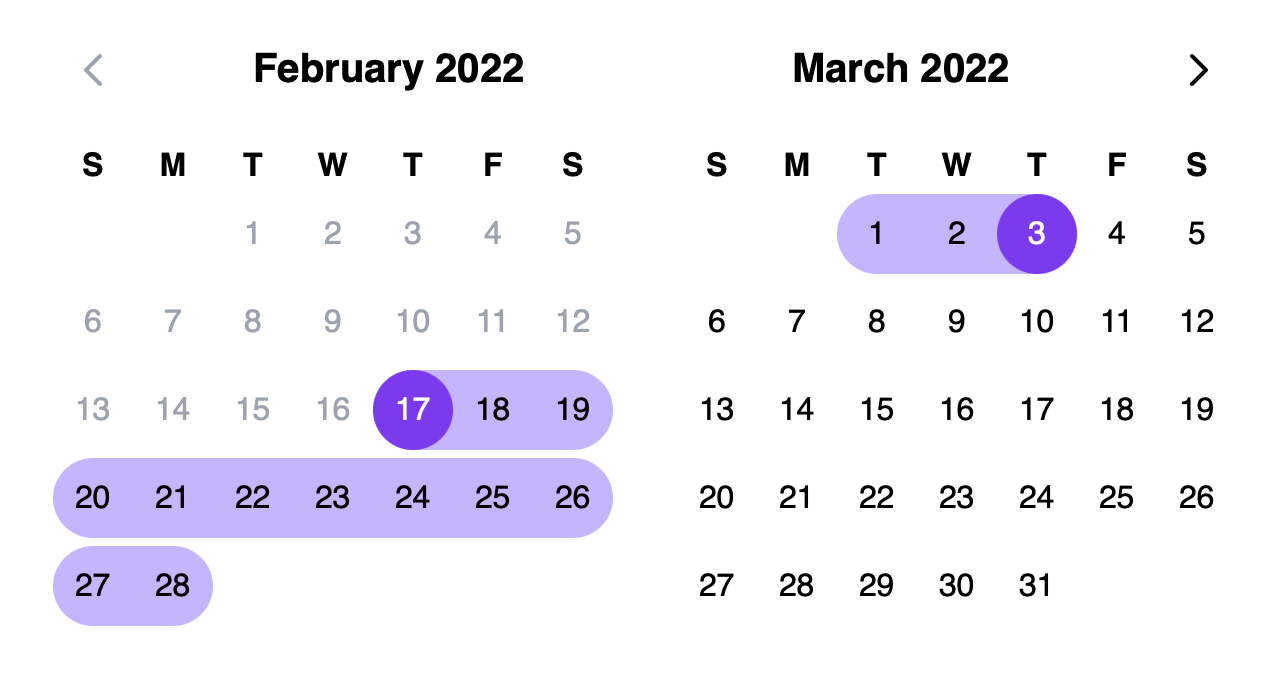
That's it! Now we can render an example of our RangeCalendar component in action.
<RangeCalendar aria-label="Trip dates" /><RangeCalendar aria-label="Trip dates" /><RangeCalendar aria-label="Trip dates" />Show CSS
.calendar {
  width: 220px;
}

.header {
  display: flex;
  align-items: center;
}

.header h2 {
  flex: 1;
  margin: 0;
  text-align: center;
}

.calendar table {
  width: 100%;
}

.cell {
  cursor: default;
  text-align: center;
}

.selected {
  background: var(--blue);
  color: white;
}

.disabled {
  color: gray;
}.calendar {
width: 220px;
}
.header {
display: flex;
align-items: center;
}
.header h2 {
flex: 1;
margin: 0;
text-align: center;
}
.calendar table {
width: 100%;
}
.cell {
cursor: default;
text-align: center;
}
.selected {
background: var(--blue);
color: white;
}
.disabled {
color: gray;
}.calendar {
width: 220px;
}
.header {
display: flex;
align-items: center;
}
.header h2 {
flex: 1;
margin: 0;
text-align: center;
}
.calendar table {
width: 100%;
}
.cell {
cursor: default;
text-align: center;
}
.selected {
background: var(--blue);
color: white;
}
.disabled {
color: gray;
}Button#
The Button component is used in the above example to navigate between months. It is built using the useButton hook, and can be shared with many other components.
Show code
import {useButton} from '@react-aria/button';

function Button(props) {
  let ref = React.useRef();
  let {buttonProps} = useButton(props, ref);
  return <button {...buttonProps} ref={ref}>{props.children}</button>;
}
import {useButton} from '@react-aria/button';
function Button(props) {
let ref = React.useRef();
let { buttonProps } = useButton(props, ref);
return (
<button {...buttonProps} ref={ref}>
{props.children}
</button>
);
}
import {useButton} from '@react-aria/button';

function Button(props) {
  let ref = React
    .useRef();
  let { buttonProps } =
    useButton(
      props,
      ref
    );
  return (
    <button
      {...buttonProps}
      ref={ref}
    >
      {props.children}
    </button>
  );
}
Styled examples#
Usage#
The following examples show how to use the RangeCalendar component created in the above example.
Value#
A RangeCalendar has no selection by default. An initial, uncontrolled value can be provided to the RangeCalendar using the defaultValue prop. Alternatively, a controlled value can be provided using the value prop.
Date ranges are objects with start and end properties containing date values, which are provided using objects in the @internationalized/date package. This library handles correct international date manipulation across calendars, time zones, and other localization concerns.
useRangeCalendar supports values with both date and time components, but only allows users to modify the dates. By default, useRangeCalendar will emit CalendarDate objects in the onChange event, but if a CalendarDateTime or ZonedDateTime object is passed as the value or defaultValue, values of that type will be emitted, changing only the date and preserving the time components.
import {parseDate} from '@internationalized/date';

function Example() {
  let [value, setValue] = React.useState({
    start: parseDate('2020-02-03'),
    end: parseDate('2020-02-12')
  });

  return (
    <div style={{display: 'flex', gap: 20, flexWrap: 'wrap'}}>
      <RangeCalendar
        aria-label="Date range (uncontrolled)"
        defaultValue={{
          start: parseDate('2020-02-03'),
          end: parseDate('2020-02-12')
        }} />
      <RangeCalendar
        aria-label="Date range (controlled)"
        value={value}
        onChange={setValue} />
    </div>
  );
}
import {parseDate} from '@internationalized/date';
function Example() {
let [value, setValue] = React.useState({
start: parseDate('2020-02-03'),
end: parseDate('2020-02-12')
});
return (
<div
style={{ display: 'flex', gap: 20, flexWrap: 'wrap' }}
>
<RangeCalendar
aria-label="Date range (uncontrolled)"
defaultValue={{
start: parseDate('2020-02-03'),
end: parseDate('2020-02-12')
}}
/>
<RangeCalendar
aria-label="Date range (controlled)"
value={value}
onChange={setValue}
/>
</div>
);
}
import {parseDate} from '@internationalized/date';

function Example() {
  let [value, setValue] =
    React.useState({
      start: parseDate(
        '2020-02-03'
      ),
      end: parseDate(
        '2020-02-12'
      )
    });

  return (
    <div
      style={{
        display: 'flex',
        gap: 20,
        flexWrap: 'wrap'
      }}
    >
      <RangeCalendar
        aria-label="Date range (uncontrolled)"
        defaultValue={{
          start:
            parseDate(
              '2020-02-03'
            ),
          end: parseDate(
            '2020-02-12'
          )
        }}
      />
      <RangeCalendar
        aria-label="Date range (controlled)"
        value={value}
        onChange={setValue}
      />
    </div>
  );
}
Events#
useRangeCalendar accepts an onChange prop which is triggered whenever a date is selected by the user. The example below uses onChange to update a separate element with a formatted version of the date in the user's locale. This is done by converting the date to a native JavaScript Date object to pass to the formatter.
import {getLocalTimeZone} from '@internationalized/date';
import {useDateFormatter} from '@react-aria/i18n';

function Example() {
  let [range, setRange] = React.useState({
    start: parseDate('2020-07-03'),
    end: parseDate('2020-07-10')
  });
  let formatter = useDateFormatter({ dateStyle: 'long' });

  return (
    <>
      <RangeCalendar
        aria-label="Date range"
        value={range}
        onChange={setRange}
      />
      <p>
        Selected date: {formatter.formatRange(
          range.start.toDate(getLocalTimeZone()),
          range.end.toDate(getLocalTimeZone())
        )}
      </p>
    </>
  );
}
import {getLocalTimeZone} from '@internationalized/date';
import {useDateFormatter} from '@react-aria/i18n';

function Example() {
  let [range, setRange] =
    React.useState({
      start: parseDate(
        '2020-07-03'
      ),
      end: parseDate(
        '2020-07-10'
      )
    });
  let formatter =
    useDateFormatter({
      dateStyle: 'long'
    });

  return (
    <>
      <RangeCalendar
        aria-label="Date range"
        value={range}
        onChange={setRange}
      />
      <p>
        Selected date:
        {' '}
        {formatter
          .formatRange(
            range.start
              .toDate(
                getLocalTimeZone()
              ),
            range.end
              .toDate(
                getLocalTimeZone()
              )
          )}
      </p>
    </>
  );
}
International calendars#
useRangeCalendar supports selecting dates in many calendar systems used around the world, including Gregorian, Hebrew, Indian, Islamic, Buddhist, and more. Dates are automatically displayed in the appropriate calendar system for the user's locale. The calendar system can be overridden using the Unicode calendar locale extension, passed to the I18nProvider component.
Selected dates passed to onChange always use the same calendar system as the value or defaultValue prop. If no value or defaultValue is provided, then dates passed to onChange are always in the Gregorian calendar since this is the most commonly used. This means that even though the user selects dates in their local calendar system, applications are able to deal with dates from all users consistently.
The below example displays a RangeCalendar in the Hindi language, using the Indian calendar. Dates emitted from onChange are in the Gregorian calendar.
import {I18nProvider} from '@react-aria/i18n';

function Example() {
  let [range, setRange] = React.useState(null);
  return (
    <I18nProvider locale="hi-IN-u-ca-indian">
      <RangeCalendar
        aria-label="Date range"
        value={range}
        onChange={setRange}
      />
      <p>Start date: {range?.start.toString()}</p>
      <p>End date: {range?.end.toString()}</p>
    </I18nProvider>
  );
}
import {I18nProvider} from '@react-aria/i18n';

function Example() {
  let [range, setRange] =
    React.useState(null);
  return (
    <I18nProvider locale="hi-IN-u-ca-indian">
      <RangeCalendar
        aria-label="Date range"
        value={range}
        onChange={setRange}
      />
      <p>
        Start date:{' '}
        {range?.start
          .toString()}
      </p>
      <p>
        End date:{' '}
        {range?.end
          .toString()}
      </p>
    </I18nProvider>
  );
}
Validation#
By default, useRangeCalendar allows selecting any date range. The minValue and maxValue props can also be used to prevent the user from selecting dates outside a certain range.
This example only accepts dates after today.
import {today} from '@internationalized/date';

<RangeCalendar aria-label="Trip dates" minValue={today(getLocalTimeZone())} />
import {today} from '@internationalized/date';
<RangeCalendar
aria-label="Trip dates"
minValue={today(getLocalTimeZone())}
/>import {today} from '@internationalized/date';
<RangeCalendar
aria-label="Trip dates"
minValue={today(
getLocalTimeZone()
)}
/>Disabled#
The isDisabled boolean prop makes the RangeCalendar disabled. Cells cannot be focused or selected.
<RangeCalendar aria-label="Trip dates" isDisabled /><RangeCalendar aria-label="Trip dates" isDisabled /><RangeCalendar
aria-label="Trip dates"
isDisabled
/>Read only#
The isReadOnly boolean prop makes the RangeCalendar's value immutable. Unlike isDisabled, the RangeCalendar remains focusable.
<RangeCalendar
  aria-label="Trip dates"
  value={{
    start: today(getLocalTimeZone()),
    end: today(getLocalTimeZone()).add({ weeks: 1 })
  }}
  isReadOnly
/><RangeCalendar
aria-label="Trip dates"
value={{
start: today(getLocalTimeZone()),
end: today(getLocalTimeZone()).add({ weeks: 1 })
}}
isReadOnly
/><RangeCalendar
aria-label="Trip dates"
value={{
start: today(
getLocalTimeZone()
),
end: today(
getLocalTimeZone()
).add({
weeks: 1
})
}}
isReadOnly
/>Labeling#
An aria-label must be provided to the RangeCalendar for accessibility. If it is labeled by a separate element, an aria-labelledby prop must be provided using the id of the labeling element instead.
Internationalization#
In order to internationalize a RangeCalendar, a localized string should be passed to the aria-label prop. For languages that are read right-to-left (e.g. Hebrew and Arabic), keyboard navigation is automatically flipped. Ensure that your CSS accounts for this as well. Dates are automatically formatted using the current locale.
Advanced topics#
Reducing bundle size#
In the example above, the createCalendar function from the @internationalized/date package is passed to the useRangeCalendarState hook. This function receives a calendar identifier string, and provides Calendar instances to React Stately, which are used to implement date manipulation.
By default, this includes all calendar systems supported by @internationalized/date. However, if your application supports a more limited set of regions, or you know you will only be picking dates in a certain calendar system, you can reduce your bundle size by providing your own implementation of createCalendar that includes a subset of these Calendar implementations.
For example, if your application only supports Gregorian dates, you could implement a createCalendar function like this:
import {useRangeCalendarState} from '@react-stately/datepicker';
import {useLocale} from '@react-aria/i18n';
import {GregorianCalendar} from '@internationalized/date';
function createCalendar(identifier) {
switch (identifier) {
case 'gregory':
return new GregorianCalendar();
default:
throw new Error(`Unsupported calendar `);
}
}
function RangeCalendar(props) {
let {locale} = useLocale();
let state = useRangeCalendarState({
...props,
locale,
createCalendar
});
// ...
}import {useRangeCalendarState} from '@react-stately/datepicker';
import {useLocale} from '@react-aria/i18n';
import {GregorianCalendar} from '@internationalized/date';
function createCalendar(identifier) {
switch (identifier) {
case 'gregory':
return new GregorianCalendar();
default:
throw new Error(`Unsupported calendar `);
}
}
function RangeCalendar(props) {
let { locale } = useLocale();
let state = useRangeCalendarState({
...props,
locale,
createCalendar
});
// ...
}
import {useRangeCalendarState} from '@react-stately/datepicker';
import {useLocale} from '@react-aria/i18n';
import {GregorianCalendar} from '@internationalized/date';
function createCalendar(
identifier
) {
switch (identifier) {
case 'gregory':
return new GregorianCalendar();
default:
throw new Error(
`Unsupported calendar `
);
}
}
function RangeCalendar(
props
) {
let { locale } =
useLocale();
let state =
useRangeCalendarState(
{
...props,
locale,
createCalendar
}
);
// ...
}
This way, only GregorianCalendar is imported, and the other calendar implementations can be tree-shaken.
See the Calendar documentation in @internationalized/date to learn more about the supported calendar systems, and a list of string identifiers.