Autocomplete
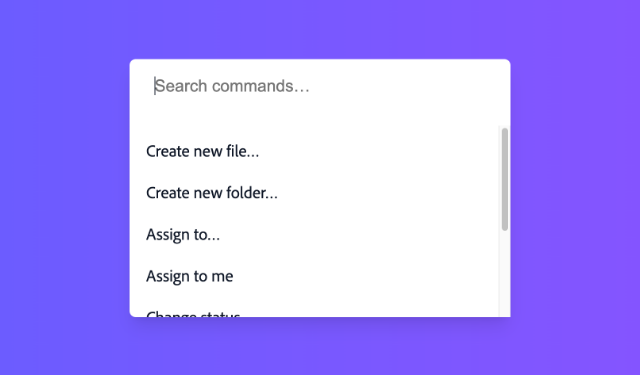
An autocomplete combines a text input with a menu, allowing users to filter a list of options to items matching a query.
| install | yarn add react-aria-components |
|---|---|
| version | 1.6.0 |
| usage | import {Autocomplete} from 'react-aria-components' |
Example#
import {Autocomplete, Button, Input, Label, Menu, MenuItem, SearchField, useFilter} from 'react-aria-components';

function Example() {
  let { contains } = useFilter({ sensitivity: 'base' });
  return (
    <div className="autocomplete">
      <Autocomplete filter={contains}>
        <SearchField>
          <Label>Commands</Label>
          <Input placeholder="Search commands...." />
          <Button>✕</Button>
        </SearchField>
        <Menu>
          <MenuItem>Create new file...</MenuItem>
          <MenuItem>Create new folder...</MenuItem>
          <MenuItem>Assign to...</MenuItem>
          <MenuItem>Assign to me</MenuItem>
          <MenuItem>Change status...</MenuItem>
          <MenuItem>Change priority...</MenuItem>
          <MenuItem>Add label...</MenuItem>
          <MenuItem>Remove label...</MenuItem>
        </Menu>
      </Autocomplete>
    </div>
  );
}
import {
  Autocomplete,
  Button,
  Input,
  Label,
  Menu,
  MenuItem,
  SearchField,
  useFilter
} from 'react-aria-components';

function Example() {
  let { contains } =
    useFilter({
      sensitivity: 'base'
    });
  return (
    <div className="autocomplete">
      <Autocomplete
        filter={contains}
      >
        <SearchField>
          <Label>
            Commands
          </Label>
          <Input placeholder="Search commands...." />
          <Button>
            ✕
          </Button>
        </SearchField>
        <Menu>
          <MenuItem>
            Create new
            file...
          </MenuItem>
          <MenuItem>
            Create new
            folder...
          </MenuItem>
          <MenuItem>
            Assign to...
          </MenuItem>
          <MenuItem>
            Assign to me
          </MenuItem>
          <MenuItem>
            Change
            status...
          </MenuItem>
          <MenuItem>
            Change
            priority...
          </MenuItem>
          <MenuItem>
            Add label...
          </MenuItem>
          <MenuItem>
            Remove
            label...
          </MenuItem>
        </Menu>
      </Autocomplete>
    </div>
  );
}
Show CSS
@import "@react-aria/example-theme";

.autocomplete {
  display: flex;
  flex-direction: column;
  gap: 12px;
  max-width: 300px;
  height: 180px;
  border: 1px solid var(--border-color);
  padding: 16px;
  border-radius: 10px;
  background: var(--overlay-background);

  .react-aria-SearchField {
    width: 100%;
  }

  .react-aria-Menu {
    flex: 1;
    overflow: auto;
  }

  .react-aria-Label {
    margin-bottom: .5em;
  }
}
@import "@react-aria/example-theme";
.autocomplete {
display: flex;
flex-direction: column;
gap: 12px;
max-width: 300px;
height: 180px;
border: 1px solid var(--border-color);
padding: 16px;
border-radius: 10px;
background: var(--overlay-background);
.react-aria-SearchField {
width: 100%;
}
.react-aria-Menu {
flex: 1;
overflow: auto;
}
.react-aria-Label {
margin-bottom: .5em;
}
}@import "@react-aria/example-theme";
.autocomplete {
display: flex;
flex-direction: column;
gap: 12px;
max-width: 300px;
height: 180px;
border: 1px solid var(--border-color);
padding: 16px;
border-radius: 10px;
background: var(--overlay-background);
.react-aria-SearchField {
width: 100%;
}
.react-aria-Menu {
flex: 1;
overflow: auto;
}
.react-aria-Label {
margin-bottom: .5em;
}
}Anatomy#
Autocomplete is a controller for a child text input, such as a TextField or SearchField, and a collection component such as a Menu or ListBox. It enables the user to filter a list of items, and navigate via the arrow keys while keeping focus on the input.
import {Autocomplete, SearchField, Menu} from 'react-aria-components';

<Autocomplete>
  <SearchField />   {/*   or <TextField />   */}
  <Menu />   {/*   or <ListBox />   */}
</Autocomplete>
import {
Autocomplete,
Menu,
SearchField
} from 'react-aria-components';
<Autocomplete>
<SearchField /> {/* or <TextField /> */}
<Menu /> {/* or <ListBox /> */}
</Autocomplete>import {
Autocomplete,
Menu,
SearchField
} from 'react-aria-components';
<Autocomplete>
<SearchField />{' '}
{/* or <TextField /> */}
<Menu />{' '}
{/* or <ListBox /> */}
</Autocomplete>Features#
An autocomplete can be built using the <datalist> HTML element, but this is very limited in functionality and difficult to style. Autocomplete helps achieve accessible autocomplete components that can be styled as needed.
- Flexible – Support for multiple input types and collection types, controlled and uncontrolled state, and custom filter functions.
- Keyboard navigation – Autocomplete can be navigated using the arrow keys, along with page up/down, home/end, etc. The list of options is filtered while typing into the input, and items can be selected with the enter key.
- Accessible – Follows the ARIA autocomplete pattern, with support for items and sections, and slots for label and description elements within each item.
- Styleable – Items include builtin states for styling, such as hover, press, focus, selected, and disabled.
Concepts#
Autocomplete makes use of the following concepts:
Composed components#
An Autocomplete can use the following components, which may also be used standalone or reused in other components.
Examples#
Starter kits#
To help kick-start your project, we offer starter kits that include example implementations of all React Aria components with various styling solutions. All components are fully styled, including support for dark mode, high contrast mode, and all UI states. Each starter comes with a pre-configured Storybook that you can experiment with, or use as a starting point for your own component library.
Reusable wrappers#
If you will use an Autocomplete in multiple places in your app, you can wrap all of the pieces into a reusable component. This way, the DOM structure, styling code, and other logic are defined in a single place and reused everywhere to ensure consistency.
This example wraps Autocomplete and all of its children together into a single component which accepts a label prop and children, which are passed through to the right places. The Item component is also wrapped to apply class names based on the current state, as described in the styling section.
import type {AutocompleteProps, Key} from 'react-aria-components';
import {Menu, MenuItem} from 'react-aria-components';
import {MySearchField} from './SearchField';

interface MyAutocompleteProps<T extends object>
  extends Omit<AutocompleteProps, 'children'> {
  label?: string;
  placeholder?: string;
  items?: Iterable<T>;
  children: React.ReactNode | ((item: T) => React.ReactNode);
  onAction?: (id: Key) => void;
}

function MyAutocomplete<T extends object>(
  { label, placeholder, items, children, onAction, ...props }:
    MyAutocompleteProps<T>
) {
  let { contains } = useFilter({ sensitivity: 'base' });
  return (
    <div className="my-autocomplete">
      <Autocomplete filter={contains} {...props}>
        <MySearchField label={label} placeholder={placeholder} />
        <Menu items={items} onAction={onAction}>
          {children}
        </Menu>
      </Autocomplete>
    </div>
  );
}

<MyAutocomplete label="Commands" placeholder="Search commands...">
  <MenuItem>Create new file...</MenuItem>
  <MenuItem>Create new folder...</MenuItem>
  <MenuItem>Assign to...</MenuItem>
  <MenuItem>Assign to me</MenuItem>
  <MenuItem>Change status...</MenuItem>
  <MenuItem>Change priority...</MenuItem>
  <MenuItem>Add label...</MenuItem>
  <MenuItem>Remove label...</MenuItem>
</MyAutocomplete>
import type {
AutocompleteProps,
Key
} from 'react-aria-components';
import {Menu, MenuItem} from 'react-aria-components';
import {MySearchField} from './SearchField';
interface MyAutocompleteProps<T extends object>
extends Omit<AutocompleteProps, 'children'> {
label?: string;
placeholder?: string;
items?: Iterable<T>;
children:
| React.ReactNode
| ((item: T) => React.ReactNode);
onAction?: (id: Key) => void;
}
function MyAutocomplete<T extends object>(
{
label,
placeholder,
items,
children,
onAction,
...props
}: MyAutocompleteProps<T>
) {
let { contains } = useFilter({ sensitivity: 'base' });
return (
<div className="my-autocomplete">
<Autocomplete filter={contains} {...props}>
<MySearchField
label={label}
placeholder={placeholder}
/>
<Menu items={items} onAction={onAction}>
{children}
</Menu>
</Autocomplete>
</div>
);
}
<MyAutocomplete
label="Commands"
placeholder="Search commands..."
>
<MenuItem>Create new file...</MenuItem>
<MenuItem>Create new folder...</MenuItem>
<MenuItem>Assign to...</MenuItem>
<MenuItem>Assign to me</MenuItem>
<MenuItem>Change status...</MenuItem>
<MenuItem>Change priority...</MenuItem>
<MenuItem>Add label...</MenuItem>
<MenuItem>Remove label...</MenuItem>
</MyAutocomplete>import type {
AutocompleteProps,
Key
} from 'react-aria-components';
import {
Menu,
MenuItem
} from 'react-aria-components';
import {MySearchField} from './SearchField';
interface MyAutocompleteProps<
T extends object
> extends
Omit<
AutocompleteProps,
'children'
> {
label?: string;
placeholder?: string;
items?: Iterable<T>;
children:
| React.ReactNode
| ((
item: T
) =>
React.ReactNode);
onAction?: (
id: Key
) => void;
}
function MyAutocomplete<
T extends object
>(
{
label,
placeholder,
items,
children,
onAction,
...props
}: MyAutocompleteProps<
T
>
) {
let { contains } =
useFilter({
sensitivity: 'base'
});
return (
<div className="my-autocomplete">
<Autocomplete
filter={contains}
{...props}
>
<MySearchField
label={label}
placeholder={placeholder}
/>
<Menu
items={items}
onAction={onAction}
>
{children}
</Menu>
</Autocomplete>
</div>
);
}
<MyAutocomplete
label="Commands"
placeholder="Search commands..."
>
<MenuItem>
Create new file...
</MenuItem>
<MenuItem>
Create new
folder...
</MenuItem>
<MenuItem>
Assign to...
</MenuItem>
<MenuItem>
Assign to me
</MenuItem>
<MenuItem>
Change status...
</MenuItem>
<MenuItem>
Change priority...
</MenuItem>
<MenuItem>
Add label...
</MenuItem>
<MenuItem>
Remove label...
</MenuItem>
</MyAutocomplete>Show CSS
.my-autocomplete {
  display: flex;
  flex-direction: column;
  gap: 12px;
  max-width: 300px;
  height: 180px;
  border: 1px solid var(--border-color);
  padding: 16px;
  border-radius: 10px;
  background: var(--overlay-background);
}

.react-aria-SearchField {
  width: 100%;
}

.react-aria-Label {
  margin-bottom: .5em;
}.my-autocomplete {
display: flex;
flex-direction: column;
gap: 12px;
max-width: 300px;
height: 180px;
border: 1px solid var(--border-color);
padding: 16px;
border-radius: 10px;
background: var(--overlay-background);
}
.react-aria-SearchField {
width: 100%;
}
.react-aria-Label {
margin-bottom: .5em;
}Value#
An Autocomplete's value is empty by default, but an initial, uncontrolled, value can be provided using the defaultInputValue prop.
Alternatively, a controlled value can be provided using the inputValue prop. Note that the input value of the Autocomplete does not affect
the ComboBox's selected option.
function Example() {
  let options = [
    {id: 1, name: 'Adobe Photoshop'},
    {id: 2, name: 'Adobe XD'},
    {id: 3, name: 'Adobe InDesign'},
    {id: 4, name: 'Adobe AfterEffects'},
    {id: 5, name: 'Adobe Illustrator'},
    {id: 6, name: 'Adobe Lightroom'},
    {id: 7, name: 'Adobe Premiere Pro'},
    {id: 8, name: 'Adobe Fresco'},
    {id: 9, name: 'Adobe Dreamweaver'}
  ];
  let [value, setValue] = React.useState('Adobe XD');

  return (
    <div style={{display: 'flex', gap: 16, flexWrap: 'wrap'}}>
      <MyAutocomplete
        label="Adobe products (Uncontrolled)"
        items={options}
        defaultInputValue="Adobe XD">        {item => <MenuItem>{item.name}</MenuItem>}
      </MyAutocomplete>

      <MyAutocomplete
        label="Adobe products (Controlled)"
        items={options}
        inputValue={value}
        onInputChange={setValue}>        {item => <MenuItem>{item.name}</MenuItem>}
      </MyAutocomplete>
    </div>
  );
}
function Example() {
let options = [
{ id: 1, name: 'Adobe Photoshop' },
{ id: 2, name: 'Adobe XD' },
{ id: 3, name: 'Adobe InDesign' },
{ id: 4, name: 'Adobe AfterEffects' },
{ id: 5, name: 'Adobe Illustrator' },
{ id: 6, name: 'Adobe Lightroom' },
{ id: 7, name: 'Adobe Premiere Pro' },
{ id: 8, name: 'Adobe Fresco' },
{ id: 9, name: 'Adobe Dreamweaver' }
];
let [value, setValue] = React.useState('Adobe XD');
return (
<div
style={{ display: 'flex', gap: 16, flexWrap: 'wrap' }}
>
<MyAutocomplete
label="Adobe products (Uncontrolled)"
items={options}
defaultInputValue="Adobe XD"
> {(item) => <MenuItem>{item.name}</MenuItem>}
</MyAutocomplete>
<MyAutocomplete
label="Adobe products (Controlled)"
items={options}
inputValue={value}
onInputChange={setValue}
> {(item) => <MenuItem>{item.name}</MenuItem>}
</MyAutocomplete>
</div>
);
}
function Example() {
  let options = [
    {
      id: 1,
      name:
        'Adobe Photoshop'
    },
    {
      id: 2,
      name: 'Adobe XD'
    },
    {
      id: 3,
      name:
        'Adobe InDesign'
    },
    {
      id: 4,
      name:
        'Adobe AfterEffects'
    },
    {
      id: 5,
      name:
        'Adobe Illustrator'
    },
    {
      id: 6,
      name:
        'Adobe Lightroom'
    },
    {
      id: 7,
      name:
        'Adobe Premiere Pro'
    },
    {
      id: 8,
      name:
        'Adobe Fresco'
    },
    {
      id: 9,
      name:
        'Adobe Dreamweaver'
    }
  ];
  let [value, setValue] =
    React.useState(
      'Adobe XD'
    );

  return (
    <div
      style={{
        display: 'flex',
        gap: 16,
        flexWrap: 'wrap'
      }}
    >
      <MyAutocomplete
        label="Adobe products (Uncontrolled)"
        items={options}
        defaultInputValue="Adobe XD"
      >        {(item) => (
          <MenuItem>
            {item.name}
          </MenuItem>
        )}
      </MyAutocomplete>

      <MyAutocomplete
        label="Adobe products (Controlled)"
        items={options}
        inputValue={value}
        onInputChange={setValue}
      >        {(item) => (
          <MenuItem>
            {item.name}
          </MenuItem>
        )}
      </MyAutocomplete>
    </div>
  );
}
Props#
| Name | Type | Default | Description |
children | ReactNode | — | The children wrapped by the autocomplete. Consists of at least an input element and a collection element to filter. |
filter | (
(textValue: string,
, inputValue: string
)) => boolean | — | An optional filter function used to determine if a option should be included in the autocomplete list. Include this if the items you are providing to your wrapped collection aren't filtered by default. |
disableAutoFocusFirst | boolean | false | Whether or not to focus the first item in the collection after a filter is performed. |
inputValue | string | — | The value of the autocomplete input (controlled). |
defaultInputValue | string | — | The default value of the autocomplete input (uncontrolled). |
Events
| Name | Type | Description |
onInputChange | (
(value: string
)) => void | Handler that is called when the autocomplete input value changes. |
Styling#
Since Autocomplete doesn't render any DOM elements itself, it doesn't offer any styling options. See the styling sections for TextField, SearchField, Menu, and ListBox for more information on how to style components within the Autocomplete.
Advanced customization#
Composition#
If you need to customize one of the components within an Autocomplete, such as TextField, SearchField, Menu or ListBox, you can create a wrapper
component. This lets you customize the props passed to the component.
function MyListBox(props) {
  return <ListBox {...props} className="my-listbox" />
}
function MyListBox(props) {
return <ListBox {...props} className="my-listbox" />
}function MyListBox(
props
) {
return (
<ListBox
{...props}
className="my-listbox"
/>
);
}
Contexts#
All React Aria Components export a corresponding context that can be used to send props to them from a parent element. This enables you to build your own compositional APIs similar to those found in React Aria Components itself. You can send any prop or ref via context that you could pass to the corresponding component. The local props and ref on the component are merged with the ones passed via context, with the local props taking precedence (following the rules documented in mergeProps).
| Component | Context | Props | Ref |
Autocomplete | AutocompleteContext | AutocompleteProps | – |
State#
Autocomplete provides an AutocompleteState object to its children via AutocompleteStateContext. This can be used to access and manipulate the autocomplete's state.
This example shows an AutocompleteClearButton component that can be placed within an Autocomplete to allow the user to clear the input.
import {AutocompleteStateContext as AutocompleteStateContext, Button} from 'react-aria-components';

function Example() {
  let { contains } = useFilter({ sensitivity: 'base' });
  return (
    <div className="custom-autocomplete">
      <Autocomplete filter={contains}>
        <MySearchField label="Animals" placeholder="Search animals..." />
        <AutocompleteClearButton />
        <Menu>
          <MenuItem id="cat">Cat</MenuItem>
          <MenuItem id="dog">Dog</MenuItem>
          <MenuItem id="kangaroo">Kangaroo</MenuItem>
        </Menu>
      </Autocomplete>
    </div>
  );
}

function AutocompleteClearButton() {
  let state = React.useContext(AutocompleteStateContext);  return (
    <Button
      className="clear-button"
      onPress={() => state?.setInputValue('')}
    >
      Clear
    </Button>
  );
}
import {
  AutocompleteStateContext as AutocompleteStateContext,
  Button
} from 'react-aria-components';

function Example() {
  let { contains } = useFilter({ sensitivity: 'base' });
  return (
    <div className="custom-autocomplete">
      <Autocomplete filter={contains}>
        <MySearchField
          label="Animals"
          placeholder="Search animals..."
        />
        <AutocompleteClearButton />
        <Menu>
          <MenuItem id="cat">Cat</MenuItem>
          <MenuItem id="dog">Dog</MenuItem>
          <MenuItem id="kangaroo">Kangaroo</MenuItem>
        </Menu>
      </Autocomplete>
    </div>
  );
}

function AutocompleteClearButton() {
  let state = React.useContext(AutocompleteStateContext);  return (
    <Button
      className="clear-button"
      onPress={() => state?.setInputValue('')}
    >
      Clear
    </Button>
  );
}
import {
  AutocompleteStateContext
    as AutocompleteStateContext,
  Button
} from 'react-aria-components';

function Example() {
  let { contains } =
    useFilter({
      sensitivity: 'base'
    });
  return (
    <div className="custom-autocomplete">
      <Autocomplete
        filter={contains}
      >
        <MySearchField
          label="Animals"
          placeholder="Search animals..."
        />
        <AutocompleteClearButton />
        <Menu>
          <MenuItem id="cat">
            Cat
          </MenuItem>
          <MenuItem id="dog">
            Dog
          </MenuItem>
          <MenuItem id="kangaroo">
            Kangaroo
          </MenuItem>
        </Menu>
      </Autocomplete>
    </div>
  );
}

function AutocompleteClearButton() {
  let state = React
    .useContext(
      AutocompleteStateContext
    );  return (
    <Button
      className="clear-button"
      onPress={() =>
        state
          ?.setInputValue(
            ''
          )}
    >
      Clear
    </Button>
  );
}
Show CSS
.custom-autocomplete {
  display: flex;
  flex-direction: column;
  gap: 12px;
  max-width: 300px;
  height: 220px;
  border: 1px solid var(--border-color);
  padding: 16px;
  border-radius: 10px;
  background: var(--overlay-background);
}

.clear-button {
  margin-top: 8px;
}
.custom-autocomplete {
  display: flex;
  flex-direction: column;
  gap: 12px;
  max-width: 300px;
  height: 220px;
  border: 1px solid var(--border-color);
  padding: 16px;
  border-radius: 10px;
  background: var(--overlay-background);
}

.clear-button {
  margin-top: 8px;
}
.custom-autocomplete {
  display: flex;
  flex-direction: column;
  gap: 12px;
  max-width: 300px;
  height: 220px;
  border: 1px solid var(--border-color);
  padding: 16px;
  border-radius: 10px;
  background: var(--overlay-background);
}

.clear-button {
  margin-top: 8px;
}Hooks#
If you need to customize things even further, such as accessing internal state, intercepting events, or customizing the DOM structure, you can drop down to the lower level Hook-based API. See useAutocomplete for more details.